
Implementing YoloV3 for object detection
Yolo is one of the greatest algorithm for real-time object detection. In its large version, it can detect thousands of object types in a quick and efficient manner. I this article, I won’t cover the technical details of YoloV3, but I’ll jump straight to the implementation. We will learn to build a simple web application with Streamlit that detects the objects present in an image. This implementation is a simplified version of Streamlit’s yolo demo.
Download the weights and config
Create a separate folder for your web application, and download the weights via your command line:
wget https://pjreddie.com/media/files/yolov3.weight
Then, download the configuration file:
wget https://pjreddie.com/media/files/yolov3.cfg
Finally, download the classes predicted by the YoloV3 algorithm in a text file:
wget https://pjreddie.com/media/files/classes.txt
App layout
# Add a title and sidebar
st.title("Object Detection")
st.sidebar.markdown("# Model")
confidence_threshold = st.sidebar.slider("Confidence threshold", 0.0, 1.0, 0.5, 0.01)
There are now 3 main steps:
- a function to download the image from the selected file
- a function to apply the object detection on the image and plot the boxes
- a selector on the sidemenu to pick the input image
The first function is quick to implement :
@st.cache(show_spinner=False)
def read_img(img):
    image = cv2.imread(img, cv2.IMREAD_COLOR)
    image = image[:, :, [2, 1, 0]] # BGR -> RGB
    return image
Then, build the function to identify the bounding boxes. The code is commented in order to understandd the key steps.
def yolo_v3(image, confidence_threshold=0.5, overlap_threshold=0.3):
# Load model architecture
net = cv2.dnn.readNetFromDarknet("yolov3.cfg", "yolov3.weights")
output_layer_names = net.getLayerNames()
output_layer_names = [output_layer_names[i[0] - 1] for i in net.getUnconnectedOutLayers()]
# Set input and get output
blob = cv2.dnn.blobFromImage(image, 1 / 255.0, (416, 416), swapRB=True, crop=False)
net.setInput(blob)
layer_outputs = net.forward(output_layer_names)
boxes, confidences, class_IDs = [], [], []
H, W = image.shape[:2]
# For each detected object, compute the box, find the score, ignore if below
for output in layer_outputs:
for detection in output:
scores = detection[5:]
classID = np.argmax(scores)
confidence = scores[classID]
if confidence > confidence_threshold:
box = detection[0:4] * np.array([W, H, W, H])
centerX, centerY, width, height = box.astype("int")
x, y = int(centerX - (width / 2)), int(centerY - (height / 2))
boxes.append([x, y, int(width), int(height)])
confidences.append(float(confidence))
class_IDs.append(classID)
# Write the name of detected objects above image
f = open("classes.txt", "r")
f = f.readlines()
f = [line.rstrip('\n') for line in list(f)]
try:
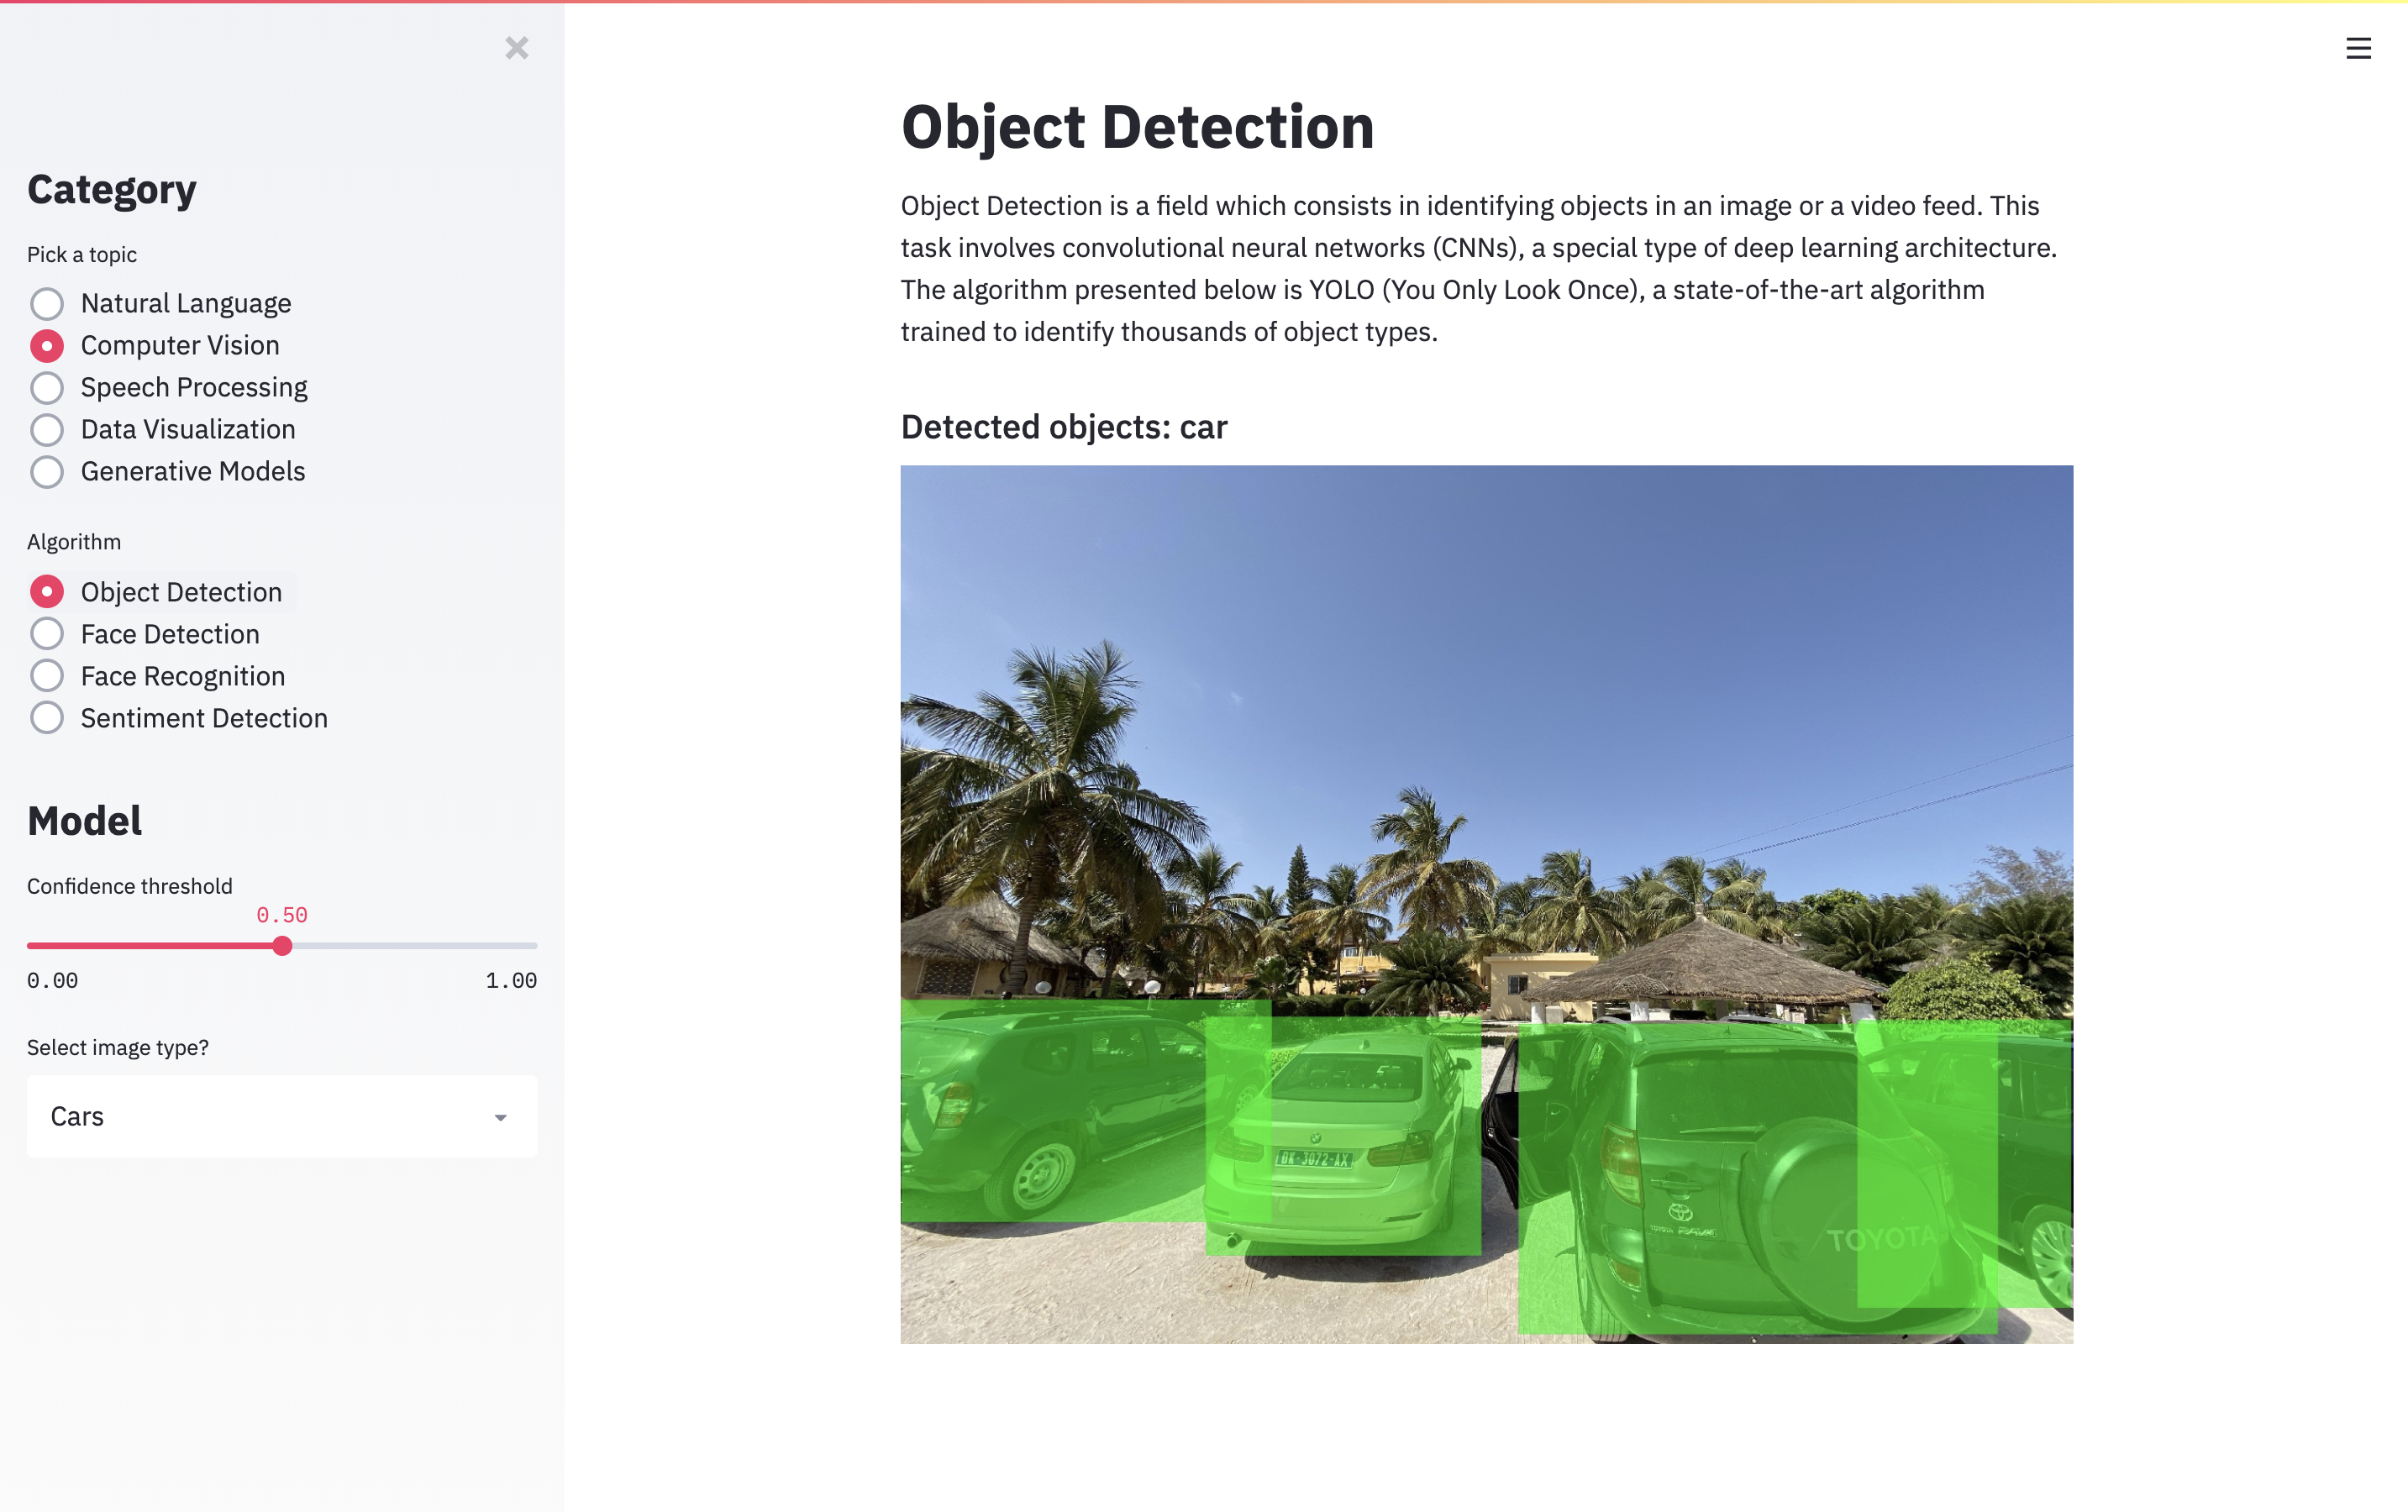
st.subheader("Detected objects: " + ', '.join(list(set([f[obj] for obj in class_IDs]))))
except IndexError:
st.write("Nothing detected")
# Apply non-max suppression to identify best bounding box
indices = cv2.dnn.NMSBoxes(boxes, confidences, confidence_threshold, overlap_threshold)
xmin, xmax, ymin, ymax, labels = [], [], [], [], []
if len(indices) > 0:
for i in indices.flatten():
x, y, w, h = boxes[i][0], boxes[i][1], boxes[i][2], boxes[i][3]
xmin.append(x)
ymin.append(y)
xmax.append(x+w)
ymax.append(y+h)
boxes = pd.DataFrame({"xmin": xmin, "ymin": ymin, "xmax": xmax, "ymax": ymax})
# Add a layer on top on a detected object
LABEL_COLORS = [0, 255, 0]
image_with_boxes = image.astype(np.float64)
for _, (xmin, ymin, xmax, ymax) in boxes.iterrows():
image_with_boxes[int(ymin):int(ymax),int(xmin):int(xmax),:] += LABEL_COLORS
image_with_boxes[int(ymin):int(ymax),int(xmin):int(xmax),:] /= 2
# Display the final image
st.image(image_with_boxes.astype(np.uint8), use_column_width=True)
Finally, let the user choose from several inout images such as car images, people, animals or a meeting, and run your pipeline on top of it.
img_type = st.sidebar.selectbox("Select image type?", ['Cars', 'People', 'Animals', "Meeting"])

if img_type == 'People':
    image_url = "images/people.jpg"
elif img_type == 'Cars':
    image_url = "images/cars.jpg"
elif img_type == 'Animals':
    image_url = "images/animal.jpg"
elif img_type == 'Meeting':
    image_url = "images/meeting.jpg"

image = read_img(image_url)

# Get the boxes for the objects detected by YOLO by running the YOLO model.
yolo_v3(image, confidence_threshold)
Finally, to run your Streamlit app, supposing that you called your app “app.py”, simply run :
streamlit run app.py
And you should be able to see this:
Conclusion : This project is adapted from Streamlit’s demo of Yolo. I tried to make the overall steps easier to understand, and executable on your own images.