The aim of this lab is to :
- Setup the API key for ML Vision API
- Invoke the pre-trained ML Vision API to classify images
- Review label predictions from Vision API
- Train and evaluate custom AutoML Vision image classification model
- Predict with AutoML on a new image
We will compare the 2 approaches (Cloud Vision and AutoML) for the task of cloud classification.
Cloud Vision API
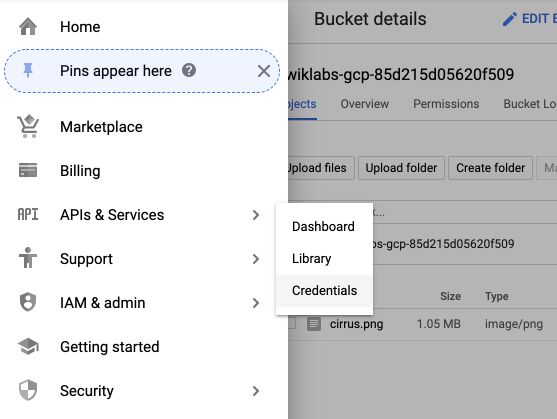
In the API and Services menu, select “Library”, look for Vision, and make sure Cloud Vision API is enabled.
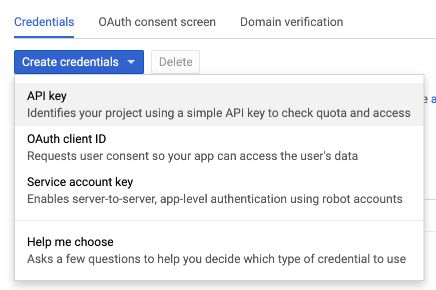
We will later need a pair of credentials for the API key. To get it, in the API & Services tab, click on “Credentials”.
Then, click on “Create credentials” :

Then, on “Create API key” :
Copy the key since we’ll need it later.
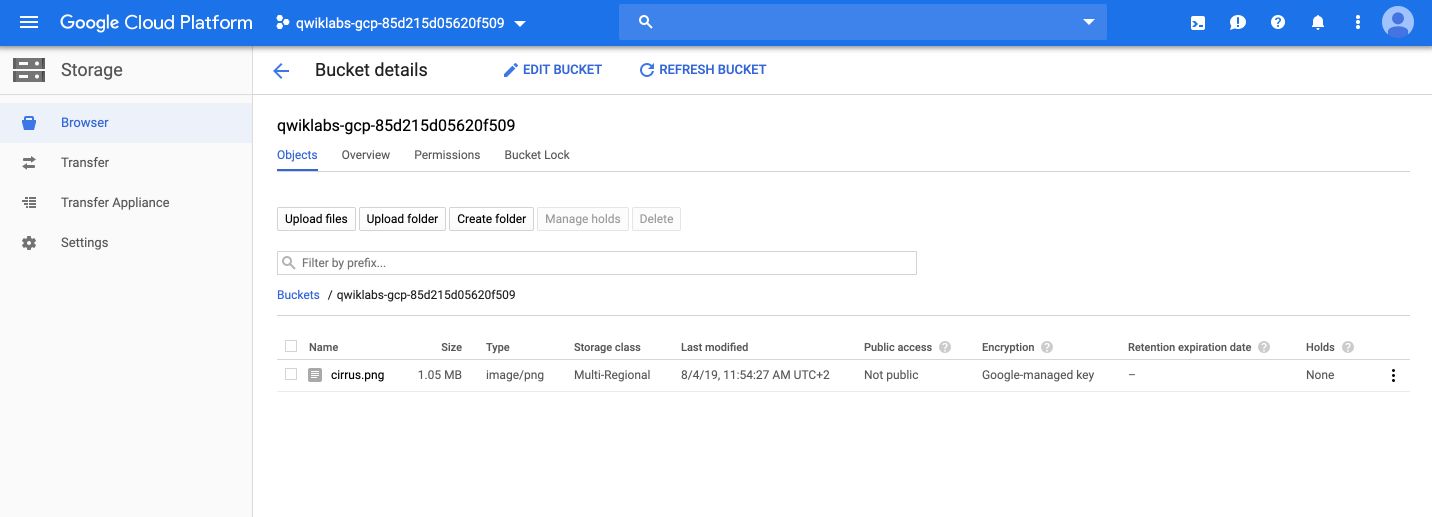
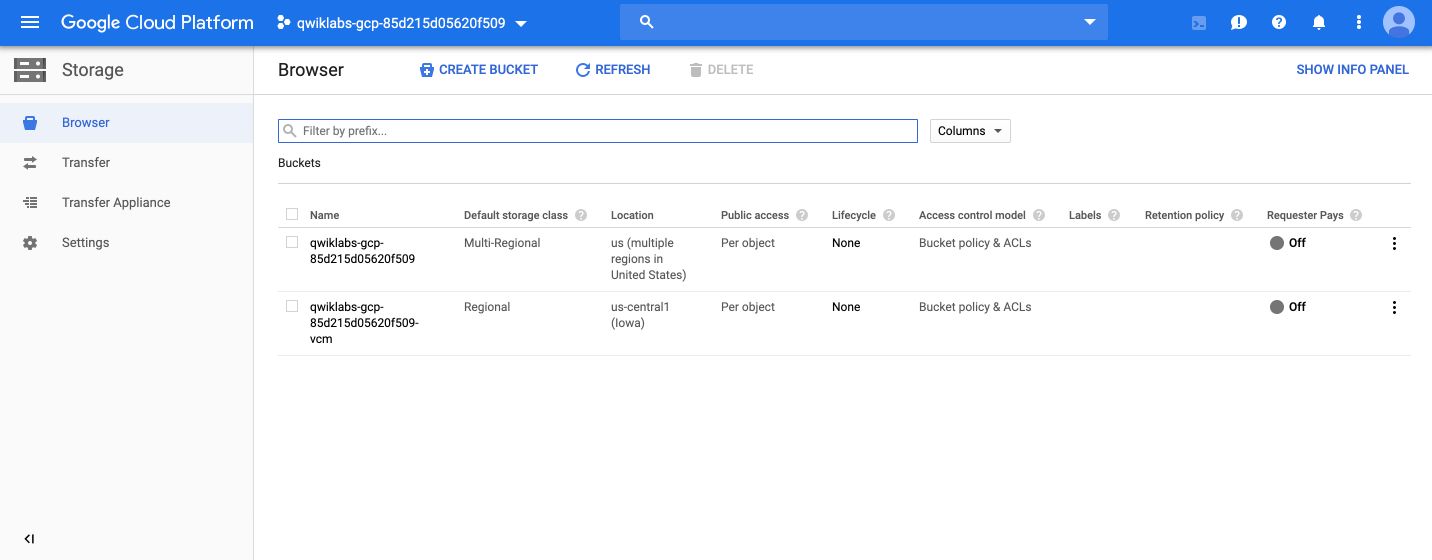
We then use Cloud Storage to store data files. Create a bucket, and give it the project’s name. Then, click on import data, and load the following image :
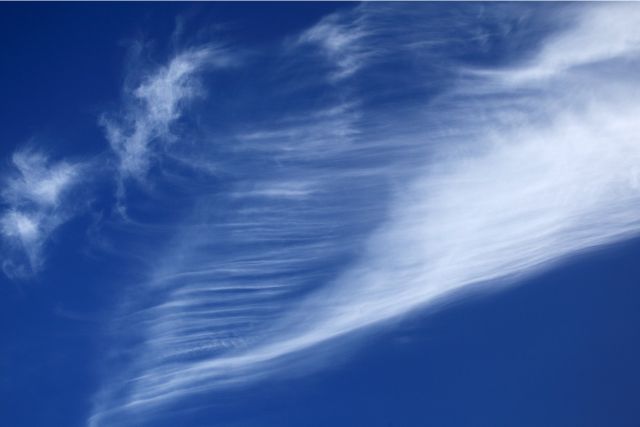
Call the image cirrus.png. Your bucket should now look like this :
We now need to make the file publicly available
google4495658_student@cloudshell:~ (qwiklabs-gcp-85d215d05620f509)$ gsutil acl ch -u AllUsers:R gs://qwiklabs-gcp-85d215d05620f509/*
We now need to create a Vision API request in a json file. We’ll use Nano. In the Shell :
google4495658_student@cloudshell:~ (qwiklabs-gcp-85d215d05620f509)$ nano request.json
It will open a nano editor. Paste the following code, and make sure to change the name of your bucket :
{
    "requests": [
        {
            "image": {
                "source": {
                    "gcsImageUri": "gs://qwiklabs-gcp-85d215d05620f509/cirrus.png"
                }
            },
            "features": [
                {
                    "type": "LABEL_DETECTION",
                    "maxResults": 10
                }
            ]
        }
    ]
}
To exit the editor, type CTRL + X. If you look at the files present, it should look like this :
google4495658_student@cloudshell:~ (qwiklabs-gcp-85d215d05620f509)$ ls
README-cloudshell.txt  request.json
We call the vision API with curl :
curl -s -X POST -H "Content-Type: application/json" --data-binary @request.json https://vision.googleapis.com/v1/images:annotate?key=<YOUR_KEY>
Replace

The output classes are sky, blue, clouds… It’s true. But what if we want a model that identifies the exact types of clouds? Like cirrus, cumulonimbus or cumulus? We can fine-tune a model with AutoML Vision.
AutoML Vision
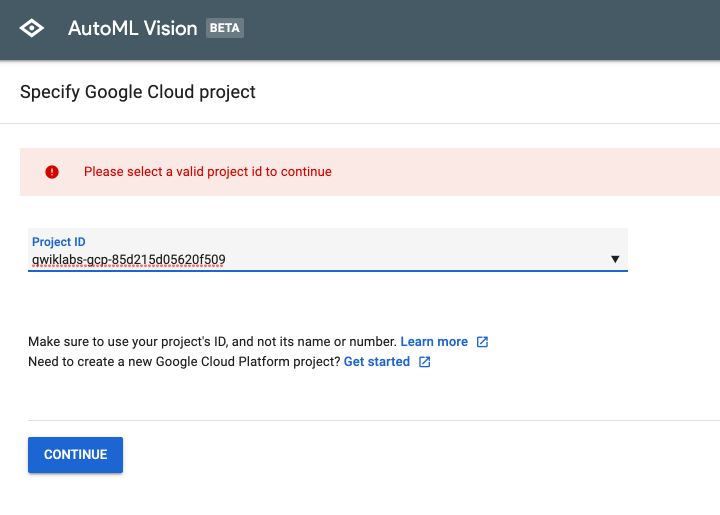
We first need to set AutoML vision. Go to : https://cloud.google.com/automl/ui/vision. Allow the log-in.
Specify the name of your project :
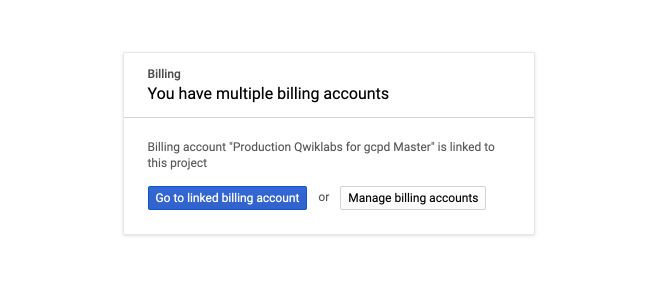
Then, on the setup page, click on “Go to billing”, and “Go to linked billing account” :
Then, click on “Setup now”. It will run for a few minutes. At some point, you’ll be redirected to AutoML Vision page :

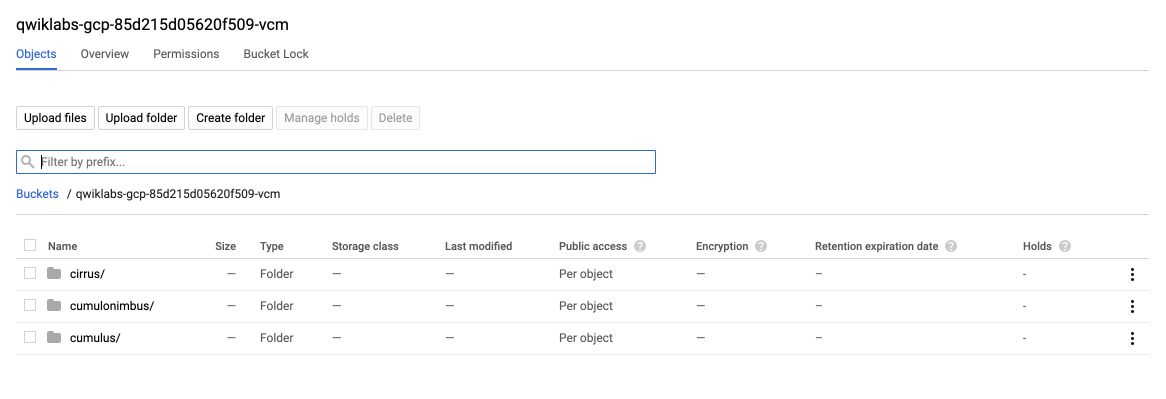
On GCP Storage, you should notice a second storage bucket with the extension vcm.
Set this bucket as an environment variable.
export BUCKET=qwiklabs-gcp-85d215d05620f509-vcm
Using the gsutil command line utility for Cloud Storage, we can copy the training images into our bucket :
gsutil -m cp -r gs://automl-codelab-clouds/* gs://qwiklabs-gcp-85d215d05620f509-vcm
We now have 3 folders :
Now that your training data in Cloud Storage, you need a way for AutoML Vision to find them. To do this you’ll create a CSV file where each row contains a URL to a training image and the associated label for that image. The CSV file has already been created before the lab.
We first needd to copy the file :
gsutil cp gs://automl-codelab-metadata/data.csv .
Then run the following command to update the CSV with the files in our project:
sed -i -e "s/placeholder/qwiklabs-gcp-85d215d05620f509-vcm/g" ./data.csv
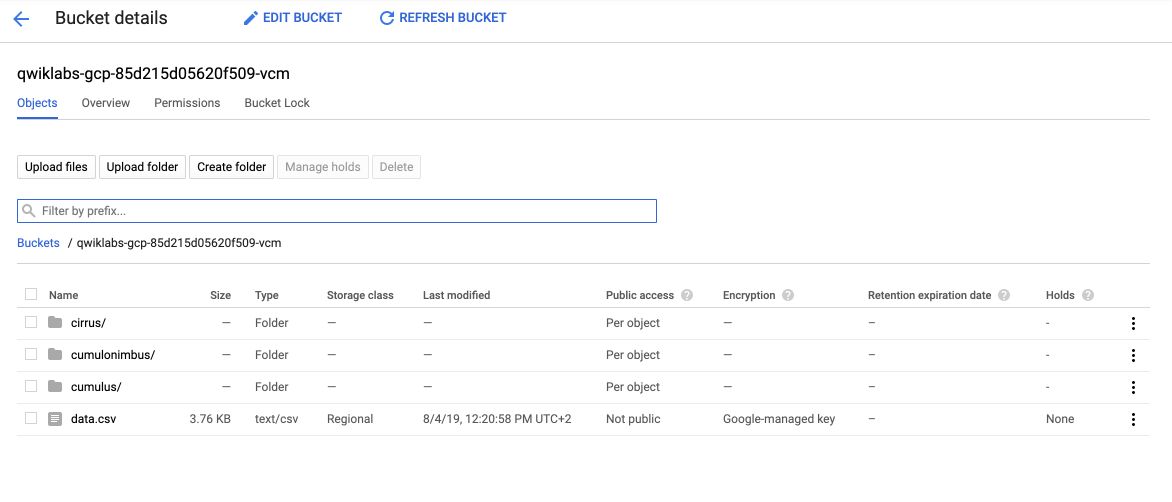
And upload this file to our Cloud Storage bucket:
gsutil cp ./data.csv gs://qwiklabs-gcp-85d215d05620f509-vcm
The bucket now contains an additional file :
Back on AutoML Vision UI, click on New Dataset, and add the link to the dataset we just created :
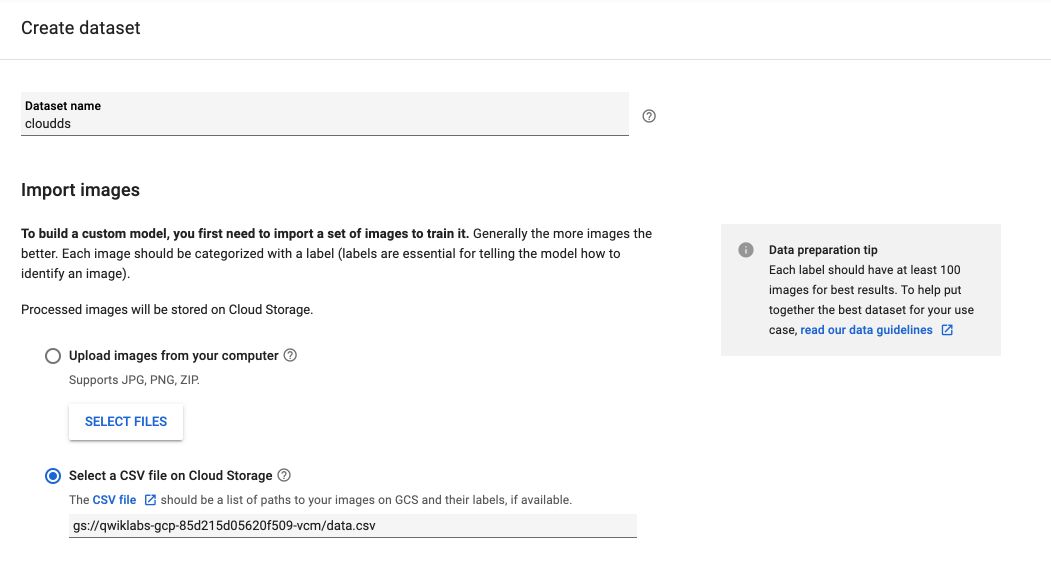
Leave the other parameters to their default value, and click on Create Dataset. The images will then load into AutoML :

After a few minutes, you’ll be able to inspect the images :
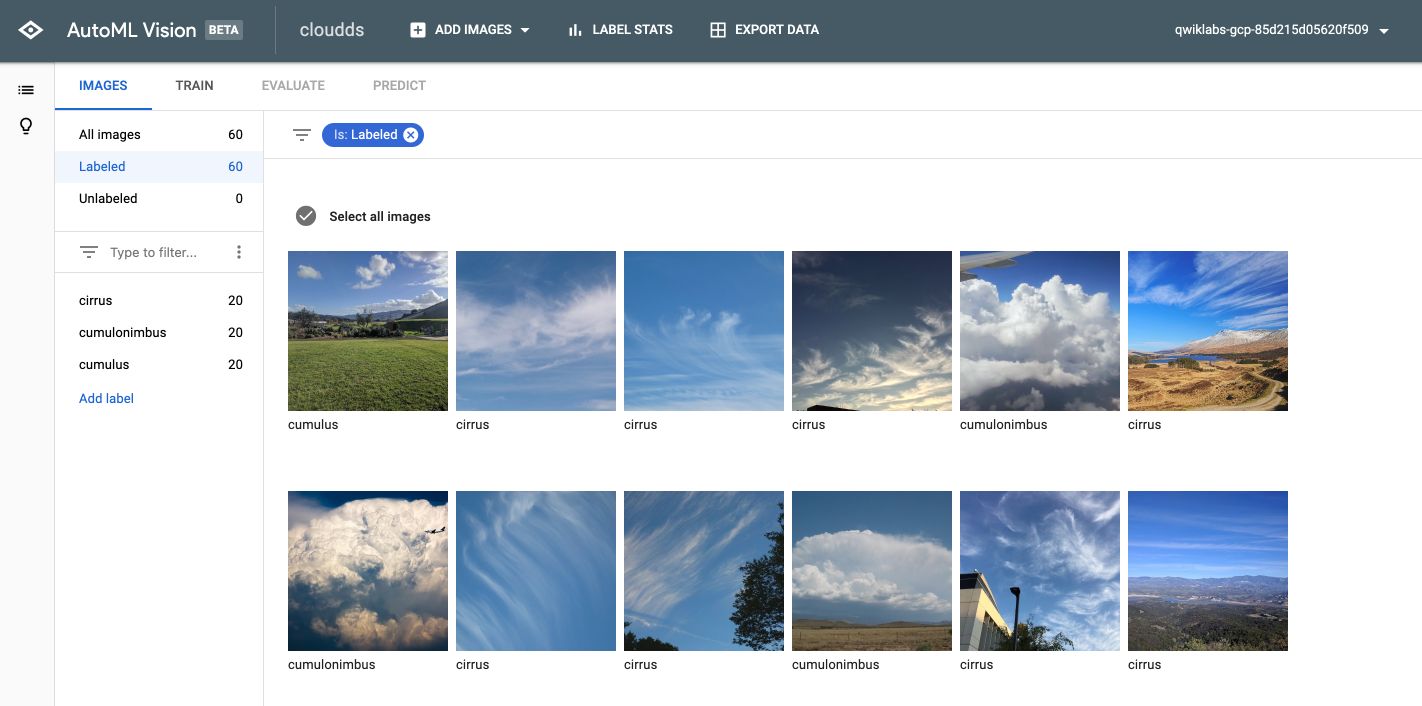
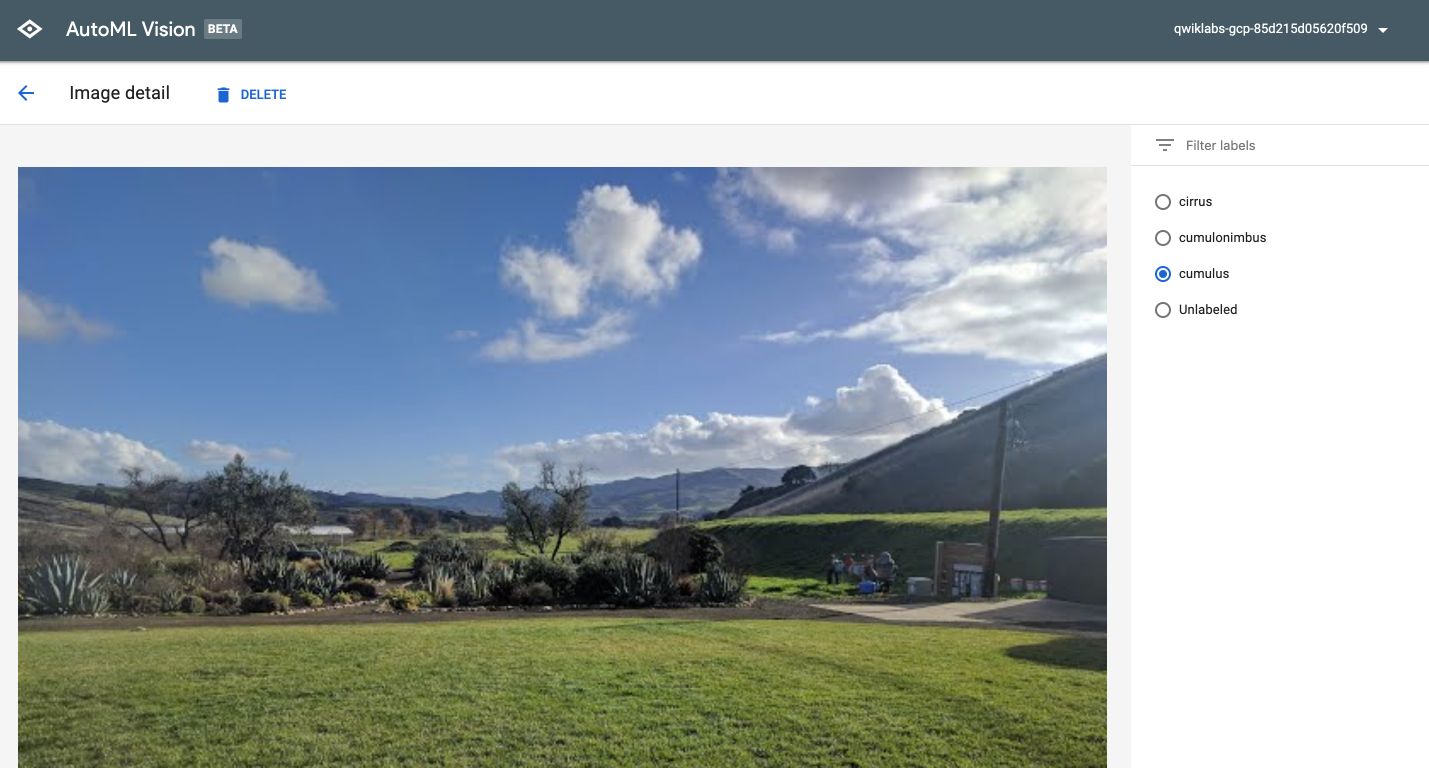
And edit the label if needed :
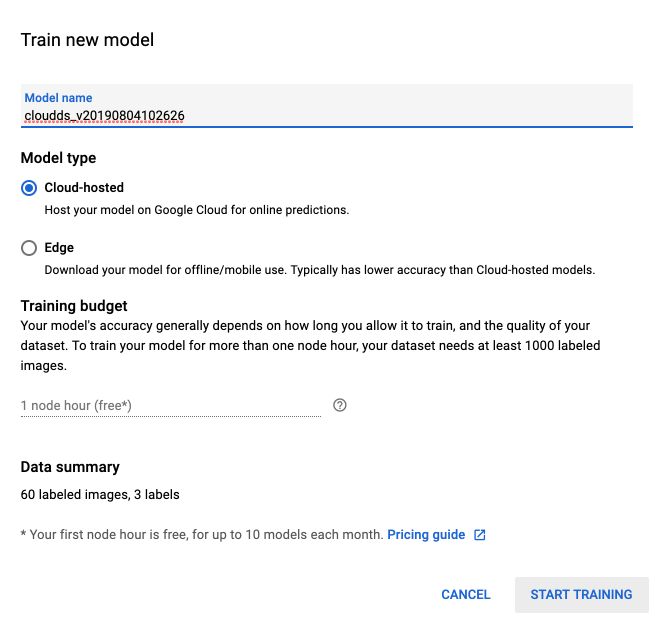
Once you’re ready, click on the “Train” tab, and on “Start Training” :
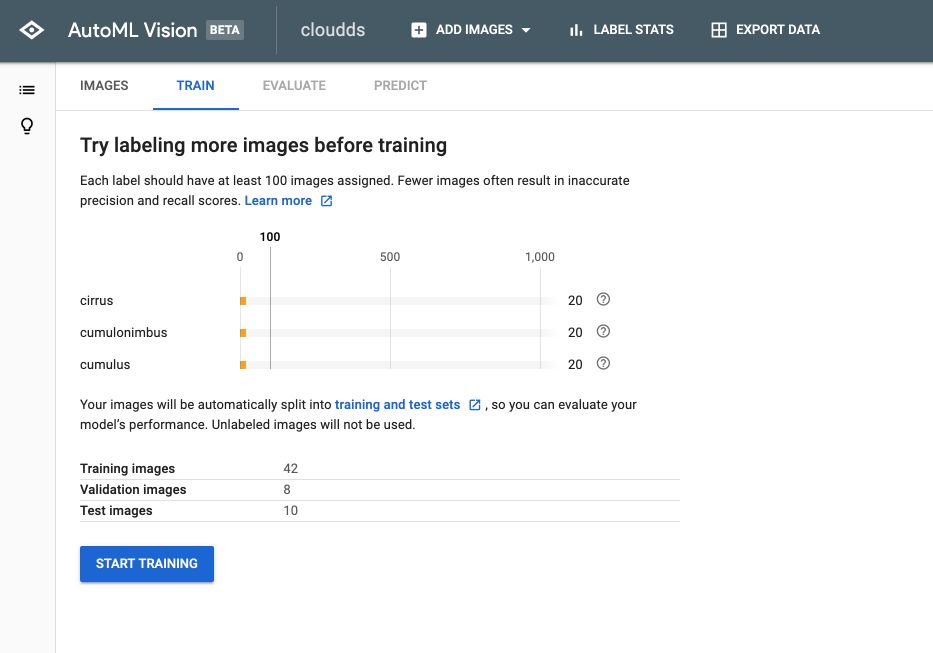
You’ll have access to 1 hour of free training at first :
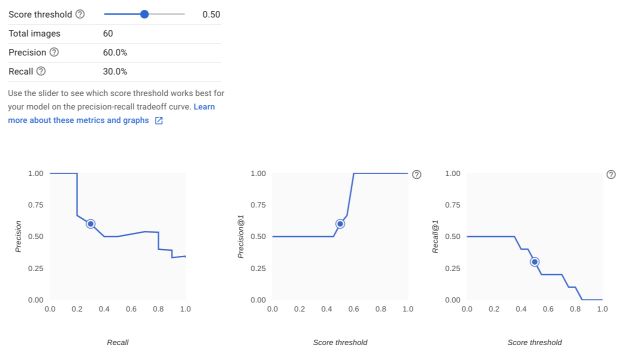
After a few minutes, once the training is over, click on “Evaluate”. You’ll have access to the evaluation report :
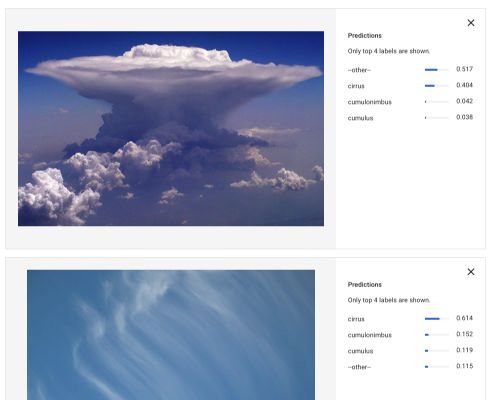
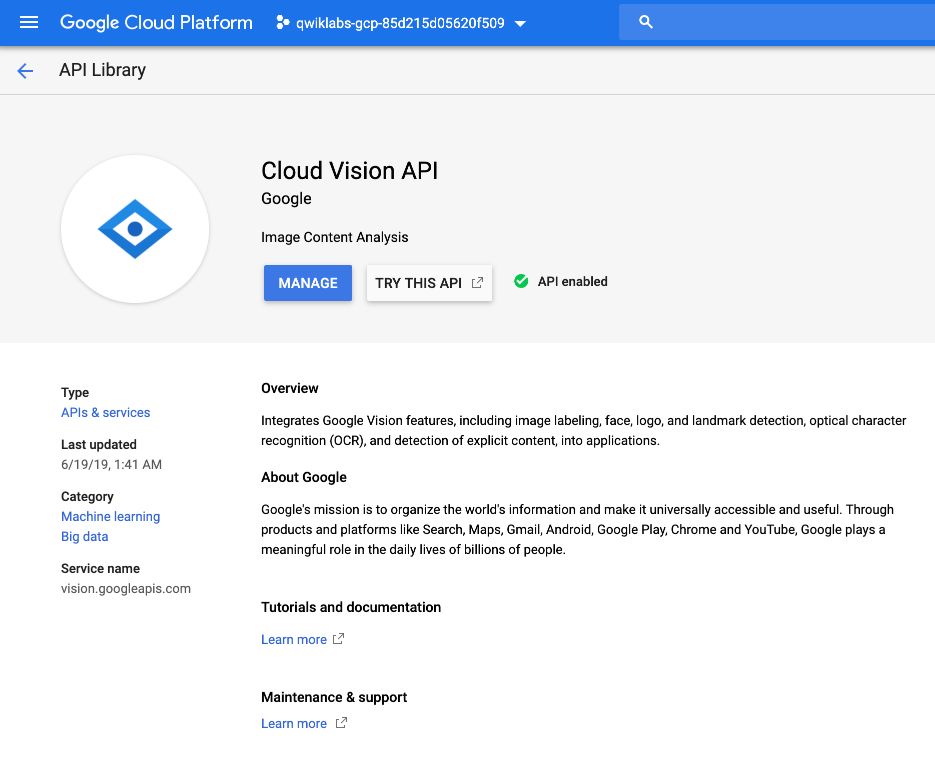
You can now make predictions using the Predict Tab :
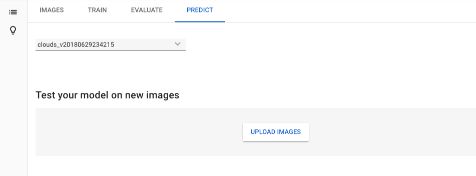
And upload new images on which you’d like to make the prediction :