

Amazon Elastic Compute Cloud (Amazon EC2) is a web service that provides secure, resizable compute capacity in the cloud. It is designed to make web-scale cloud computing easier for developers. This tutorial will help you to get started with AWS EC2.
Configure the instance
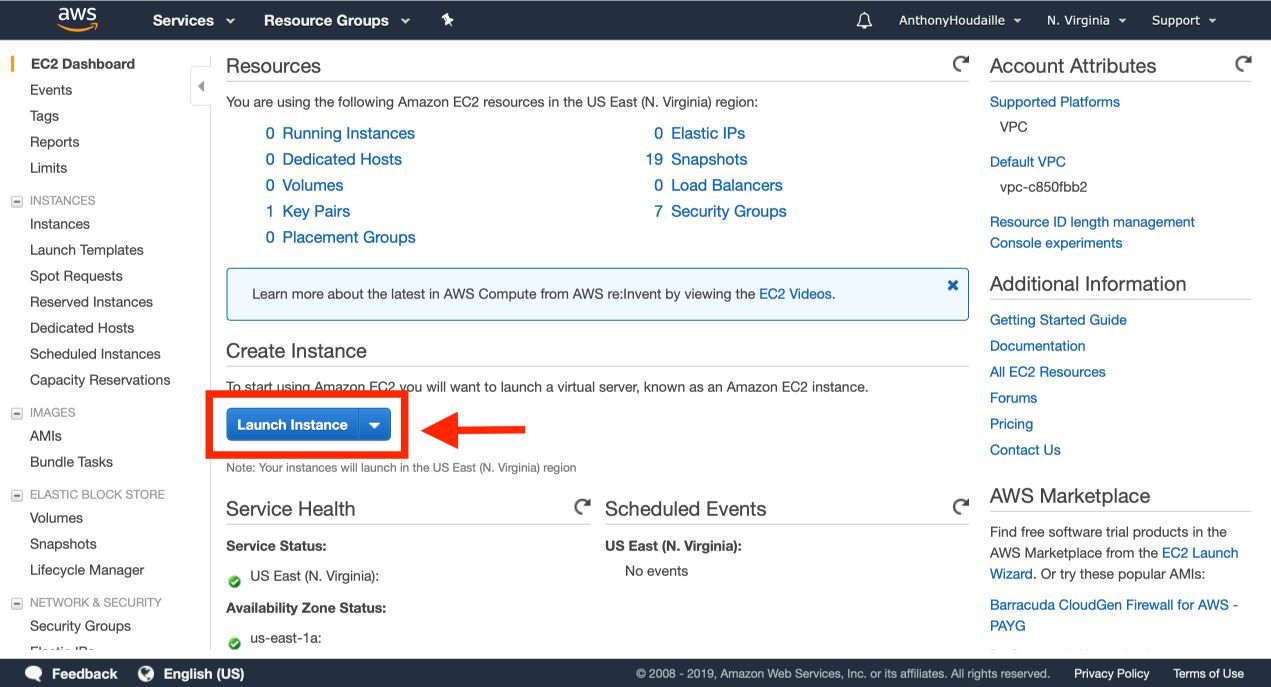
a. From AWS Console, click on “EC2” and “Launch instance” :
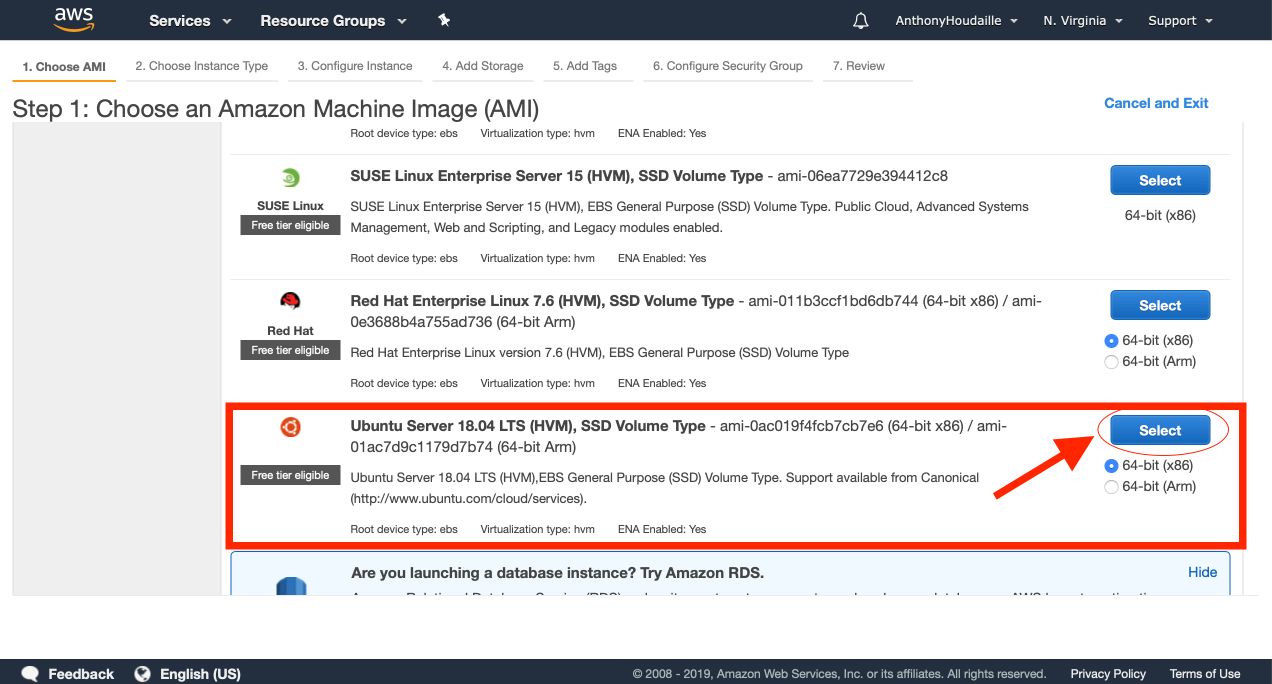
b. Then, select the Amazon Machine Image (AMI) which defines your boot OS. For this tutorial, I chose Ubuntu Server 18.04 LTS (HVM), SSD Volume Type image :
c. Next step, select the type of instance you would like to launch. Make sure to select an instance that matches your needs. t2-micro are perfect for test phases. When deploying services in production, you might want to focus on m5a.xlarge for example. Take a look at the following link for the detailed hourly cost of each machine : https://aws.amazon.com/fr/ec2/pricing/reserved-instances/pricing/
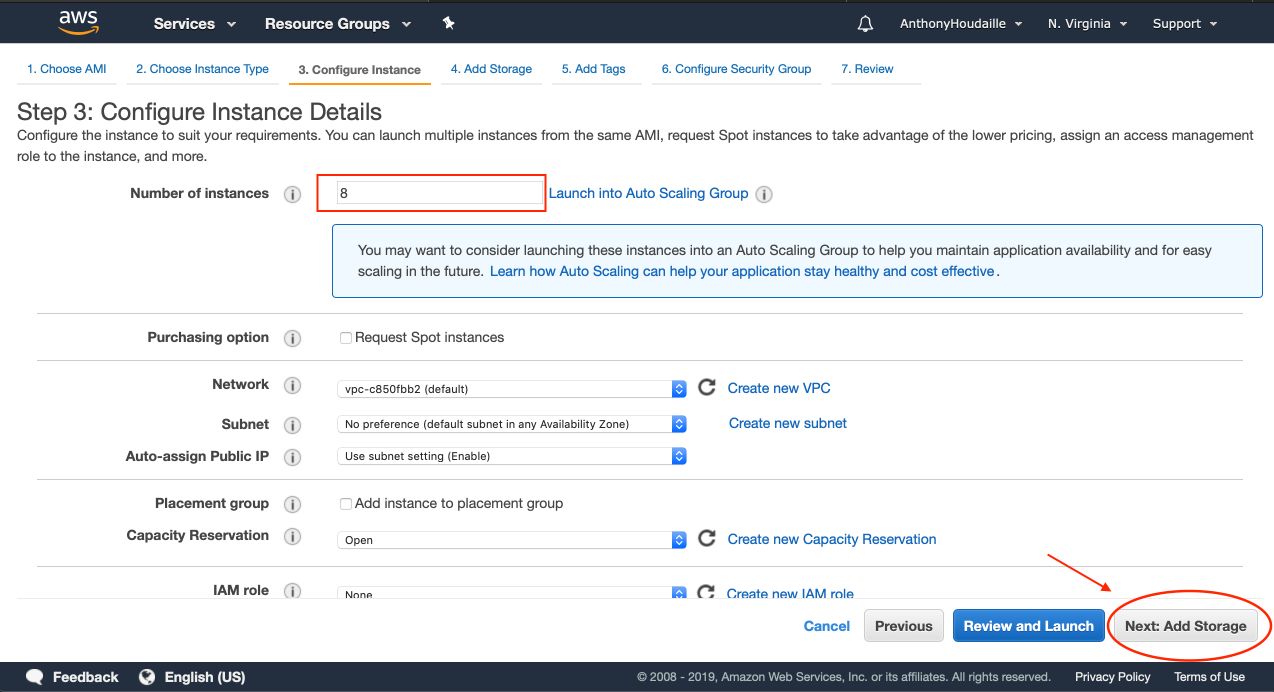
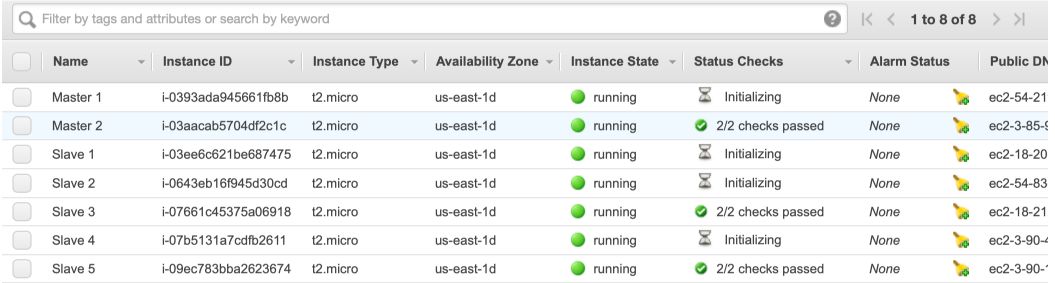
Depending on the complexity of your project and the resiliency requirements, you might want to add several instances to your cluster. Here, for example, we’ll add 8 instances.
d. At the next step, you’ll be invited to add storage. Some Big Data projects imply several To. of data. For the sake of simplicity, we’ll use the standard storage of 8Gb. The storage is typically paid by Gb stored monthly.
e. If needed, add tags. Else, just move on to the next step.
f. The security group allows your instances to communicate with other instances within the same security group. The communication between the slaves and the master is essential to transfer data typically.
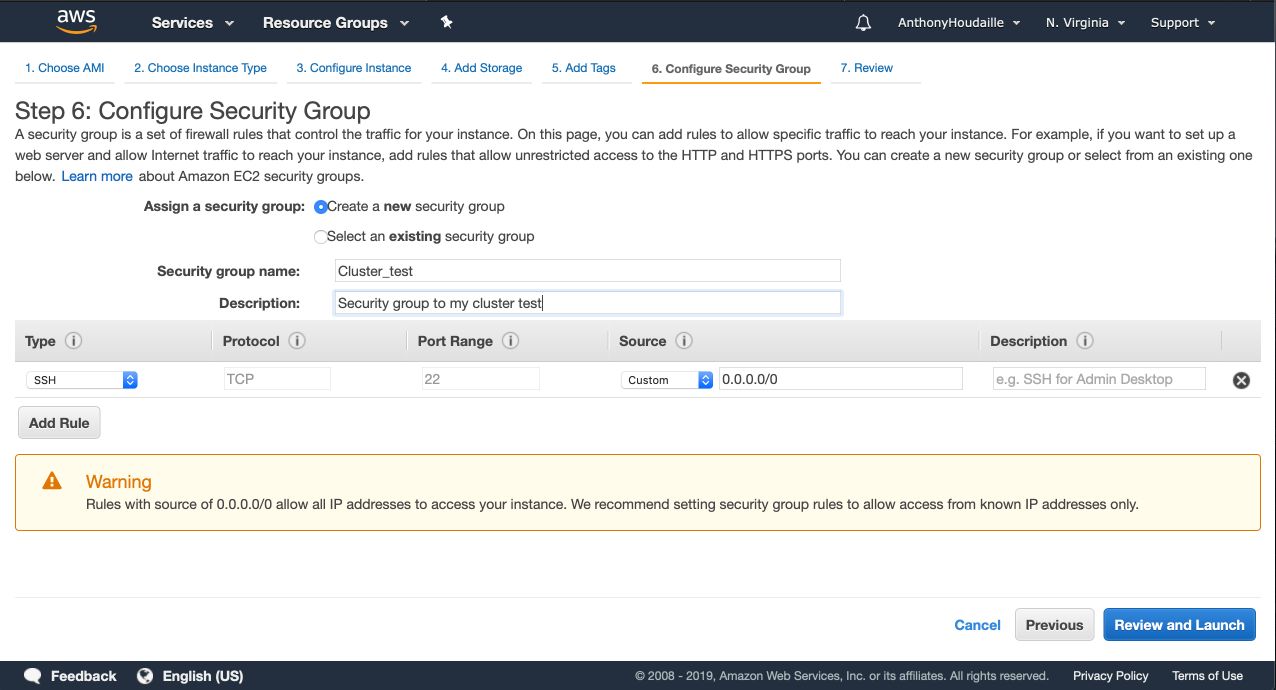
This specific configuration allows SSH from anywhere. You might want to change this setting when working on real data.
We’re almost done. Just review your previous step, and click “Launch”.
Create a key pair
a. “Amazon uses public-key cryptography to encrypt and decrypt login information. Public–key cryptography uses a public key to encrypt a piece of data, such as a password, then the recipient uses the private key to decrypt the data. The public and private keys are known as a key pair”. At this step, simply create a key pair and make sure to save it!
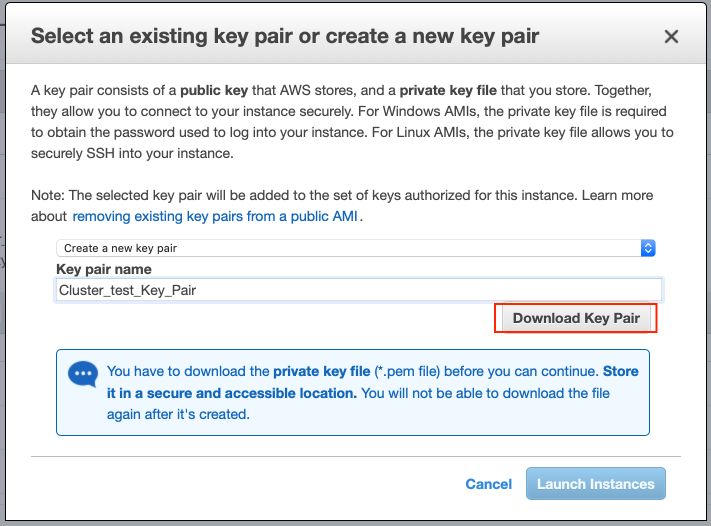
If you are working on Windows or Linux, I think the extension would be something like .txt. Make sure to change it to .pem to identify your file as a key pair.
b. All your instances are now being initialized. For clarity, change the name of your instances accordingly to their role.
SSH Connection
a. Protect your key pair from accidental overwriting
Open your terminal. Once you are in the folder that contains your key pair, copy-paste this code :
chmod 400 Cluster_test_Key_Pair.pem
b. Try a connexion to one of your instances
Copy the public DNS of Master 1 from your AWS Console :
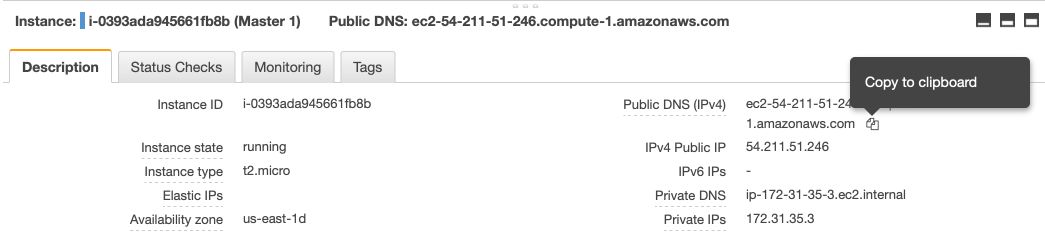
Then, execute the following commande bellow :
ssh -i "<path to your keyPair directory>/Cluster_test_Key_Pair.pem" ubuntu@<copy the public DNS>
You should now be connected to your newly created EC2 cluster!
In the next article, we’ll focus on installing Apache-Cassandra on an AWS EC2 Cluster