

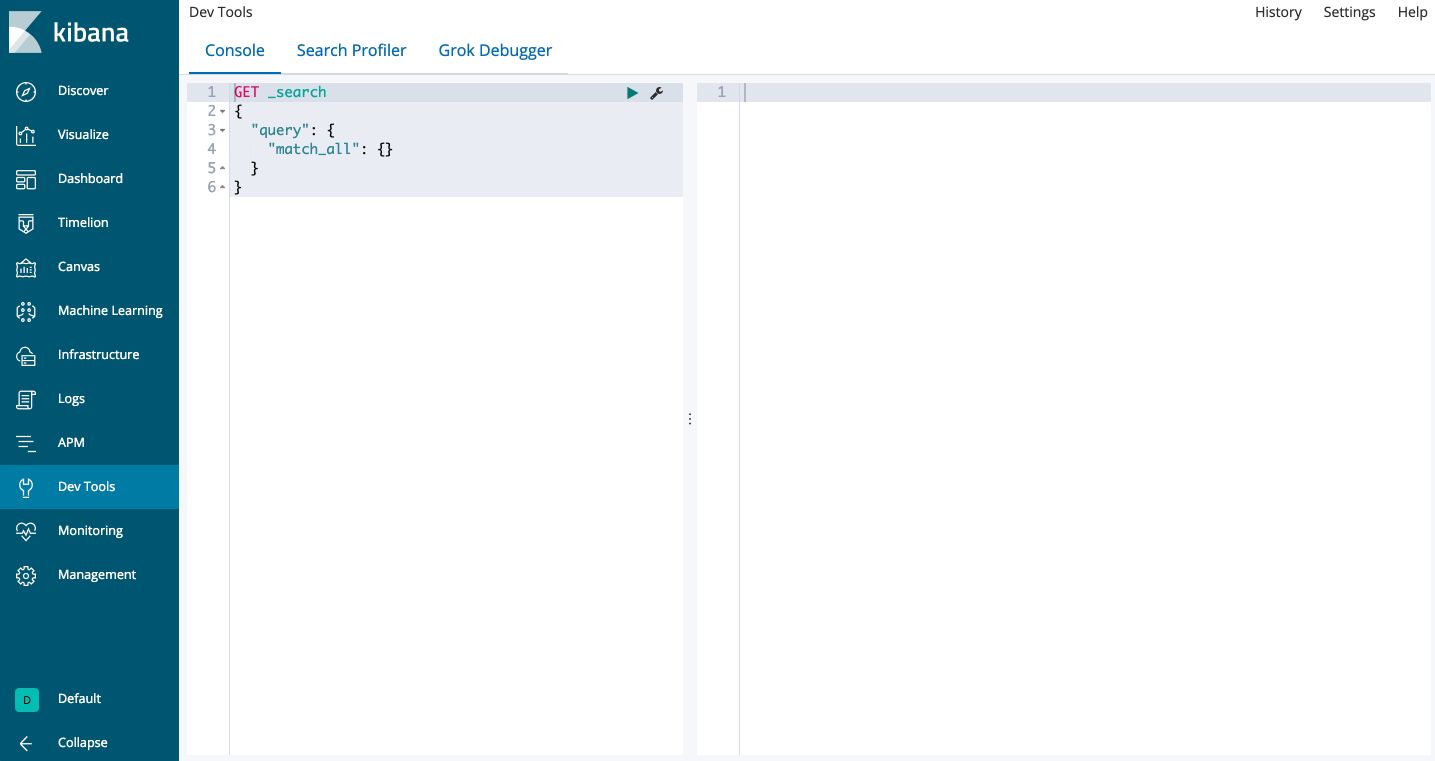
I. Kibana Dev Tools
Head to the Dev Tools section in Kibana.
Elasticsearch stores documents in JSON format.
1. JSON files
JSON files are built the following way, according to a key-value structure :
{
    "name" : "Mike",
    "location" : {
        "city" : "California",
        "geo" : [39.76, 92.71],
    }
    "age" : 23
}
The types of data supported are :
- string
- number
- object
- array
- boolean
- null
2. Add/index a document
Indexing a document means storing it in Elasticsearch. Elasticsearch operates on several REST endpoints. There is a REST API we are going to work with. Then, we’ll interact with those REST endpoints to perform certain actions with ElasticSearch.
We’ll follow the example of the official documentation in which we study a restaurant food safety violation in the city of San Francisco.
POST /inspections/_doc
{
    "business_address" : "660 Sacramento St",
    "business_city" : "San Francisco",
    "business_id" : "2228",
    "business_latitude" : "37.793698",
    "business_location" : {
        "type": "Point",
        "coordinates" : [
        -122.403984,
        37.793698
        ]
    },
    "business_longitude" : "-122.403984",
    "business_name" : "Tokyo Express",
    "business_postal_code" : "94111",
    "business_state" : "CA",
    "inspection_date" : "2016-02-04T00:00:00.000",
    "inspection_id" : "2228_20160204",
    "inspection_type" : "Routine",
    "inspection_score" : 96,
    "risk_category" : "Low Risk",
    "violation_description" : "Unclean nonfood contact surfaces",
    "violation_id" : "2228_20160204_103142"
}
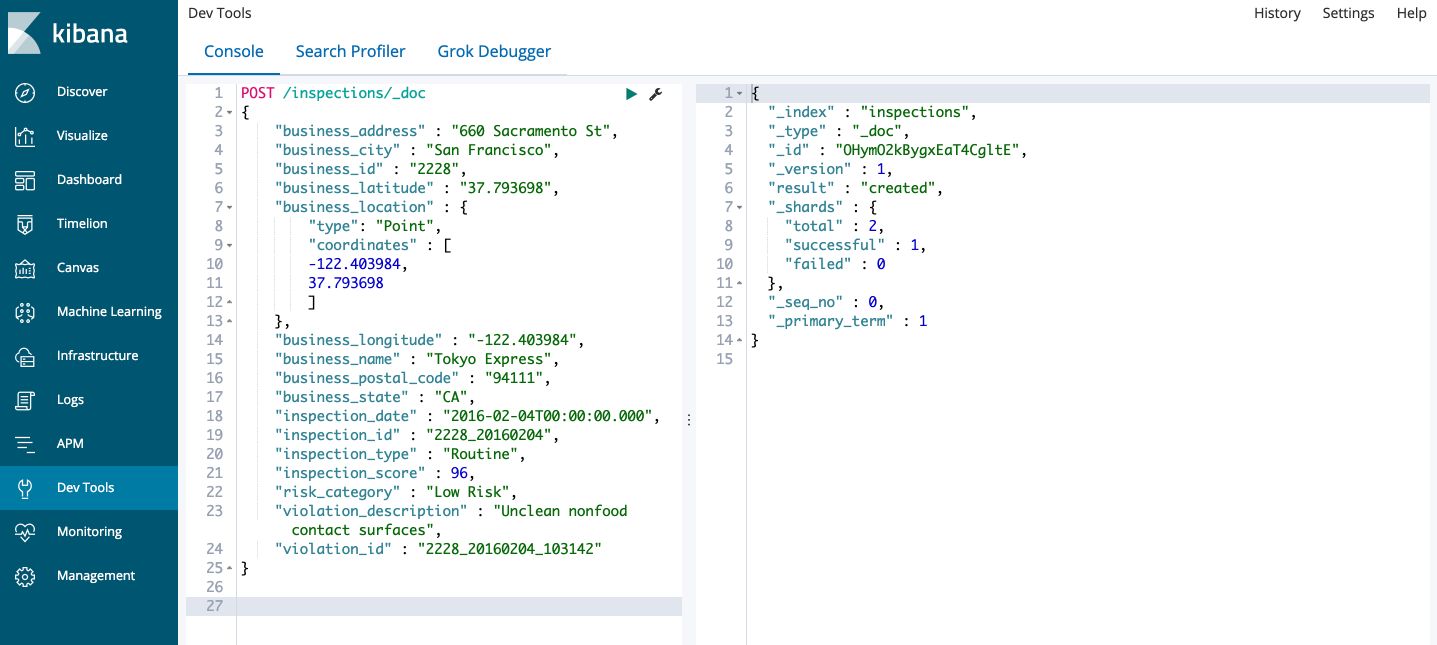
Then, click on the green button to send the request. You should have something like this :
At a given REST endpoint, there are several actions we can make :
- POST: to create a new index. Allows to specify the index, here
inspections, and a type of documents under the index, here_doc. Every time we run this command, we add a new index. Elasticsearch will automatically create and add a newid. It forces uniqueness for that document. - PUT: to create a new index. Requires an
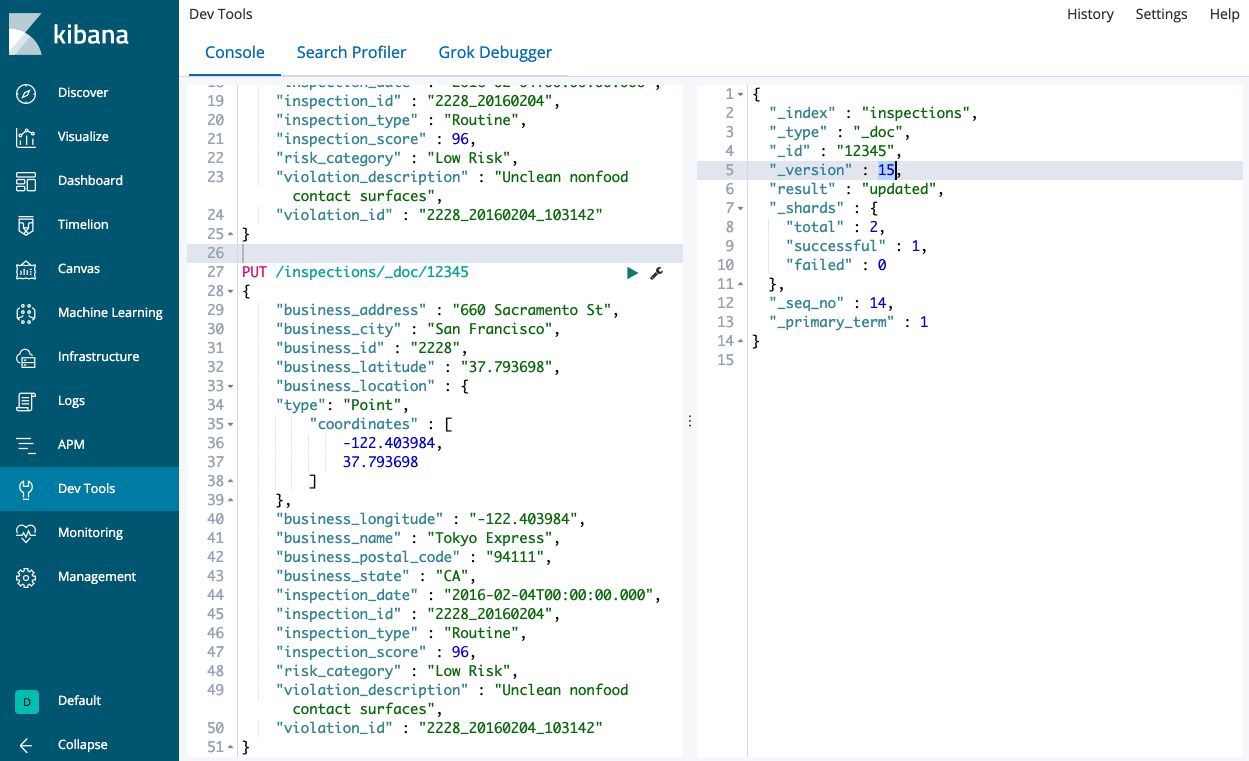
idfor the document as part of the URL to avoid duplicates.
PUT /inspections/_doc/12345
{
    "business_address" : "660 Sacramento St",
    "business_city" : "San Francisco",
    "business_id" : "2228",
    "business_latitude" : "37.793698",
    "business_location" : {
    "type": "Point",
        "coordinates" : [
            -122.403984,
            37.793698
        ]
    },
    "business_longitude" : "-122.403984",
    "business_name" : "Tokyo Express",
    "business_postal_code" : "94111",
    "business_state" : "CA",
    "inspection_date" : "2016-02-04T00:00:00.000",
    "inspection_id" : "2228_20160204",
    "inspection_type" : "Routine",
    "inspection_score" : 96,
    "risk_category" : "Low Risk",
    "violation_description" : "Unclean nonfood contact surfaces",
    "violation_id" : "2228_20160204_103142"
}
Here, 12345 would be the unique ID. If you run this command several times, the number of documents does not change, but the version of the document is incremented.
- DELETE: To delete the index we created above, for example,
DELETE /inspections
We can also create an index beforehand to set certain settings.
PUT /inspections
{
    "settings" : {
    "index.number_of_shards":1,
    "index.number_of_replicas":0
    }
}
We have now created an index with 0 documents in it.
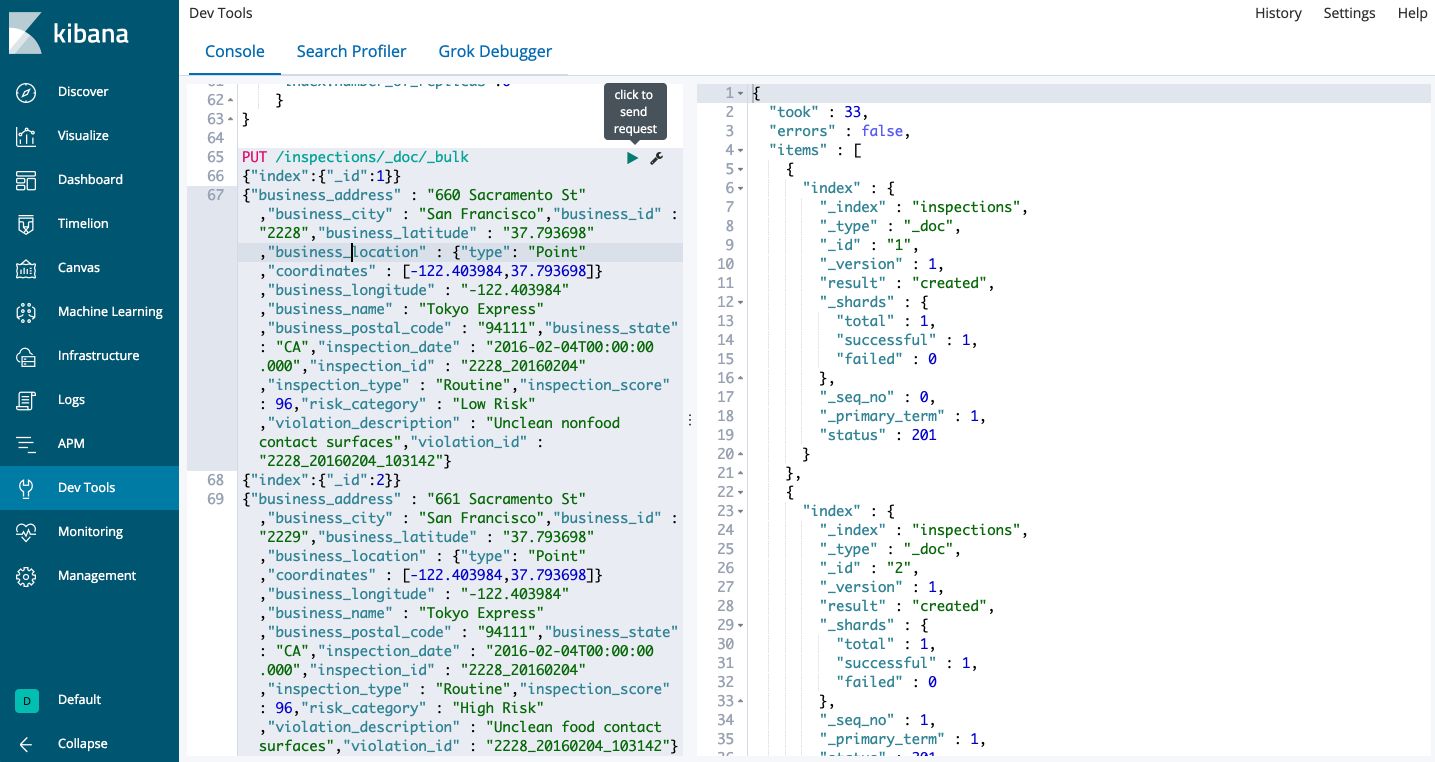
When we want to add several documents, we should use the bulk API :
PUT /inspections/_doc/_bulk
{"index":{"_id":1}}
{"business_address" : "660 Sacramento St","business_city" : "San Francisco","business_id" : "2228","business_latitude" : "37.793698","business_location" : {"type": "Point","coordinates" : [-122.403984,37.793698]},"business_longitude" : "-122.403984","business_name" : "Tokyo Express San Francisco","business_postal_code" : "94111","business_state" : "CA","inspection_date" : "2016-02-04T00:00:00.000","inspection_id" : "2228_20160204","inspection_type" : "Routine","inspection_score" : 96,"risk_category" : "Low Risk","violation_description" : "Unclean nonfood contact surfaces","violation_id" : "2228_20160204_103142"}
{"index":{"_id":2}}
{"business_address" : "661 Sacramento St","business_city" : "San Francisco","business_id" : "2229","business_latitude" : "37.793698","business_location" : {"type": "Point","coordinates" : [-122.403984,37.793698]},"business_longitude" : "-122.403984","business_name" : "Soup Paradise","business_postal_code" : "94111","business_state" : "CA","inspection_date" : "2016-02-04T00:00:00.000","inspection_id" : "2228_20160204","inspection_type" : "Routine","inspection_score" : 96,"risk_category" : "High Risk","violation_description" : "Unclean food contact surfaces","violation_id" : "2228_20160204_103142"}
If everything worked well, you should have the following return :
3. Search/get a document
The structure for a search query is quite simple: GET /inspections/_doc/_search
It returns a list of all documents that are of the type _doc and belong to the index inspections.
Let’s now find all businesses whose name contains the word “Soup” :
GET /inspections/_doc/_search
{
    "query" : {
        "match" : {
            "business_name" : "Soup"
        }
    }
}
And it returns the restaurant “Soup Paradise”, which is exactly what we wanted :
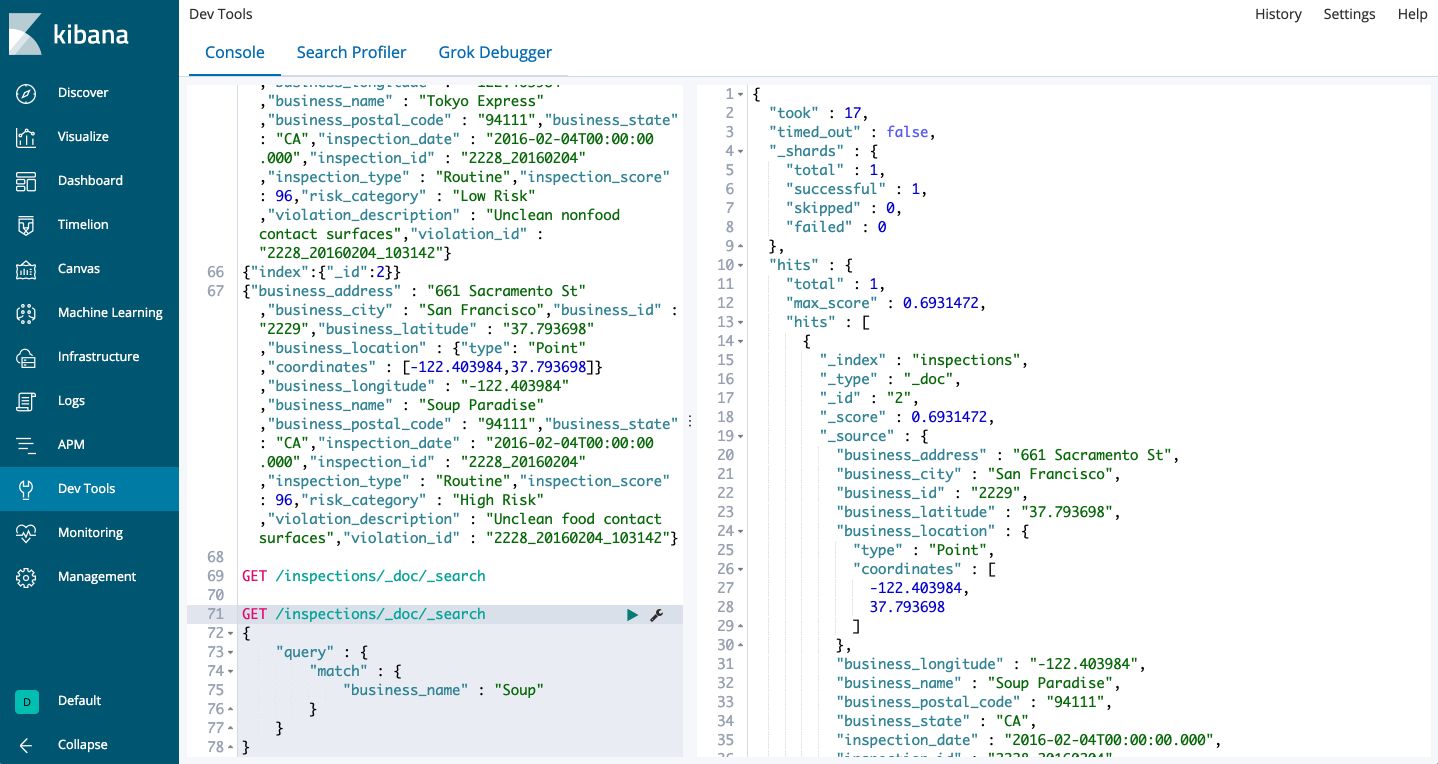
This is the structure of a basic search query in Elasticsearch. You might have noticed the field "max_score": 0.6931472. This is a relevance score computed automatically by Elasticsearch. The most relevant documents are displayed first.
If you want to match a whole phrase, use the match_phrase function :
GET /inspections/_doc/_search
{
    "query" : {
        "match" : {
            "business_name" : "san francisco"
        }
    }
}
Results are once again sorted by max_score.
We can also combine portions of queries together :
GET /inspections/_doc/_search
{
    "query" : {
        "bool" : {
            "must" : [
                {
                    "match" : {
                        "business_name" : "san francisco"
                    }
                },
                {
                    "match" : {
                        "business_name" : "tokyo"
                    }
                }
            ]
        }
    }
}
This will return the restaurant Toky Express San Francisco. bool is a boolean query operator. The must operator states that both of these sub-queries must be true.
We can also make sure that the result of our query does not contain a given word :
GET /inspections/_doc/_search
{
    "query" : {
        "bool" : {
            "must_not" : [
                {
                    "match" : {
                        "business_name" : "san francisco"
                    }
                }
            ]
        }
    }
}
And this query returns Soup Paradise since we do not want the restaurant’s name to contain the phrase “San Francisco”.
If you want to attach some more importance to a given part of the query, the following request adds a boost to the work Tokyo :
GET /inspections/_doc/_search
{
    "query" : {
        "bool" : {
            "should" : [
                {
                    "match_phrase" : {
                        "business_name" : {
                            "query" : "tokyo express",
                            "boost" : 3
                        }
                    }
                },
                {
                    "match_phrase" : {
                        "business_name" : "san francisco"
                    }
                }
            ]
        }
    }
}
To highlight the field of the result we were looking for :
GET /inspections/_doc/_search
{
    "query" : {
        "match" : {
            "business_name" : "san francisco"
        }
    },
    "highlight" : {
        "fields" : {
        "business_name" : {}
        }
    }
}
We can specify a numerical operator to make a search on the inspection_score for example using the range operator :
GET /inspections/_doc/_search
{
    "query" : {
        "range" : {
            "inspection_score" : {
                "gte" : 80
            }
        }
    },
    "sort" : [
        {"inspection_score" : "desc"}
    ]
}
This returns all entries whose inspection score is greater than 80. To find a full list of the possible operators, check this link.
4. SQL Queries
In the Dev Tools console, there is a SQL interpreter which makes it easy to write simple queries. There are several ways actually to write SQL queries in Elasticsearch :
- through SQL endpoint
- through the command-line interface (CLI) tool in the
bindirectory of Elasticsearch - through JDBC Elasticsearch client
Here is an example of the SQL endpoint :
POST /_xpack/sql?format=txt
{
    "query" : "SELECT business_name, inspection_score FROM inspections ORDER BY inspection_score"
}
It should return the following table :
business_name              |inspection_score
---------------------------+----------------
Tokyo Express San Francisco|96
Soup Paradise              |96
5. Aggregations
Aggregations might be useful for example when a user wants, for example, to find all hotels within a price group, or all restaurant that belongs to a certain group of inspections scores :
GET /inspections/_doc/_search
{
    "query" : {
        "match" : {
            "business_name" : "Soup"
        }
    },
    "aggregations" : {
        "inspection_score" : {
            "range" : {
                "field" : "inspection_score",
                "ranges" : [
                    {
                        "key" : "0-80",
                        "from" : 0,
                        "to" : 80
                    },
                    {
                        "key" : "81-90",
                        "from" : 81,
                        "to" : 90
                    },
                    {
                        "key" : "91-100",
                        "from" : 91,
                        "to" : 100
                    }
                ]
            }
        }
    }
}
You’ll notice at the end of the result an aggregation result which is exactly what we were looking for :
"aggregations" : {
    "inspection_score" : {
        "buckets" : [
            {
                "key" : "0-80",
                "from" : 0.0,
                "to" : 80.0,
                "doc_count" : 0
            },
            {
                "key" : "81-90",
                "from" : 81.0,
                "to" : 90.0,
                "doc_count" : 0
            },
            {
                "key" : "91-100",
                "from" : 91.0,
                "to" : 100.0,
                "doc_count" : 1
            }
        ]
    }
}
6. Geo-Search
Now, let’s imagine that a user is looking for the nearest restaurant. This kind of queries can typically be achieved by geo-search!
First of all, we must change the document types to _mapping to specify that the coordinates are Geo-JSON points. Mapping makes it more efficient to define the structure of the document, and more efficiently store/search the data within our index. We need to delete out the index and perform our bulk import again :
DELETE /inspections
Then, create it again :
PUT /inspections
PUT /inspections/_mapping/_doc
{
    "properties" : {
        "business_address" : {
            "type" : "text",
            "fields" : {
                "keyword" : {
                    "type" : "keyword",
                    "ignore_above" : 256
                }
            }
        },
        "business_city" : {
            "type" : "text",
            "fields" : {
                "keyword" : {
                    "type" : "keyword",
                    "ignore_above" : 256
                }
            }
        },
        "business_id" : {
            "type" : "text",
            "fields" : {
                "keyword" : {
                    "type" : "keyword",
                    "ignore_above" : 256
                }
            }
        },
        "business_latitude" : {
            "type" : "text",
            "fields" : {
                "keyword" : {
                    "type" : "keyword",
                    "ignore_above" : 256
                }
            }
        },
        "business_longitude" : {
            "type" : "text",
            "fields" : {
                "keyword" : {
                    "type" : "keyword",
                    "ignore_above" : 256
                }
            }
        },
        "business_name" : {
            "type" : "text",
            "fields" : {
                "keyword" : {
                    "type" : "keyword",
                    "ignore_above" : 256
                }
            }
        },
        "coordinates" : {
            "type" : "geo_point"
        }
    }
}
Now, we can execute again the bulk requests to add the data as defined previously :
PUT /inspections/_doc/_bulk
{"index":{"_id":1}}
{"business_address" : "660 Sacramento St","business_city" : "San Francisco","business_id" : "2228","business_latitude" : "37.793698","business_location" : {"type": "Point","coordinates" : [-122.403984,37.793698]},"business_longitude" : "-122.403984","business_name" : "Tokyo Express San Francisco","business_postal_code" : "94111","business_state" : "CA","inspection_date" : "2016-02-04T00:00:00.000","inspection_id" : "2228_20160204","inspection_type" : "Routine","inspection_score" : 96,"risk_category" : "Low Risk","violation_description" : "Unclean nonfood contact surfaces","violation_id" : "2228_20160204_103142"}
{"index":{"_id":2}}
{"business_address" : "661 Sacramento St","business_city" : "San Francisco","business_id" : "2229","business_latitude" : "38.52","business_location" : {"type": "Point","coordinates" : [-122.403984,37.793698]},"business_longitude" : "-121.42","business_name" : "Soup Paradise","business_postal_code" : "94111","business_state" : "CA","inspection_date" : "2016-02-04T00:00:00.000","inspection_id" : "2228_20160204","inspection_type" : "Routine","inspection_score" : 96,"risk_category" : "High Risk","violation_description" : "Unclean food contact surfaces","violation_id" : "2228_20160204_103142"}
We can specify the order, the unit (km) and the distance type (here, by plane) from a given input point :
GET /inspections/_mapping/_search
{
    "sort" : [
        {
            "_geo_distance" : {
                "coordinates" : {
                    "lat" : 37.800175,
                    "lon" : -122.409081
                },
                "order" : "asc",
                "unit" : "km",
                "distance_type" : "plane"
            }
        }
    ]
}
7. Update documents
Suppose we now add a flag to documents and count the number of views per inspection report. We might need to do a partial update if any of those information changes.
GET /inspections/_doc/2/_update
{
    "doc" : {
        "flagged" : true,
        "views" : 0
    }
}
The document 2 has now been partially updated!
8. Delete documents
We can delete a document easily :
DELETE /inspections/_doc/2
9. Analyzers and tokenizers
Dev Tools in Elasticsearch integrates pre-built tokenizers for text processing :
GET /inspections/_analyze
{
    "tokenizer" : "standard",
    "text" : "my email address is test123@company.com"
}
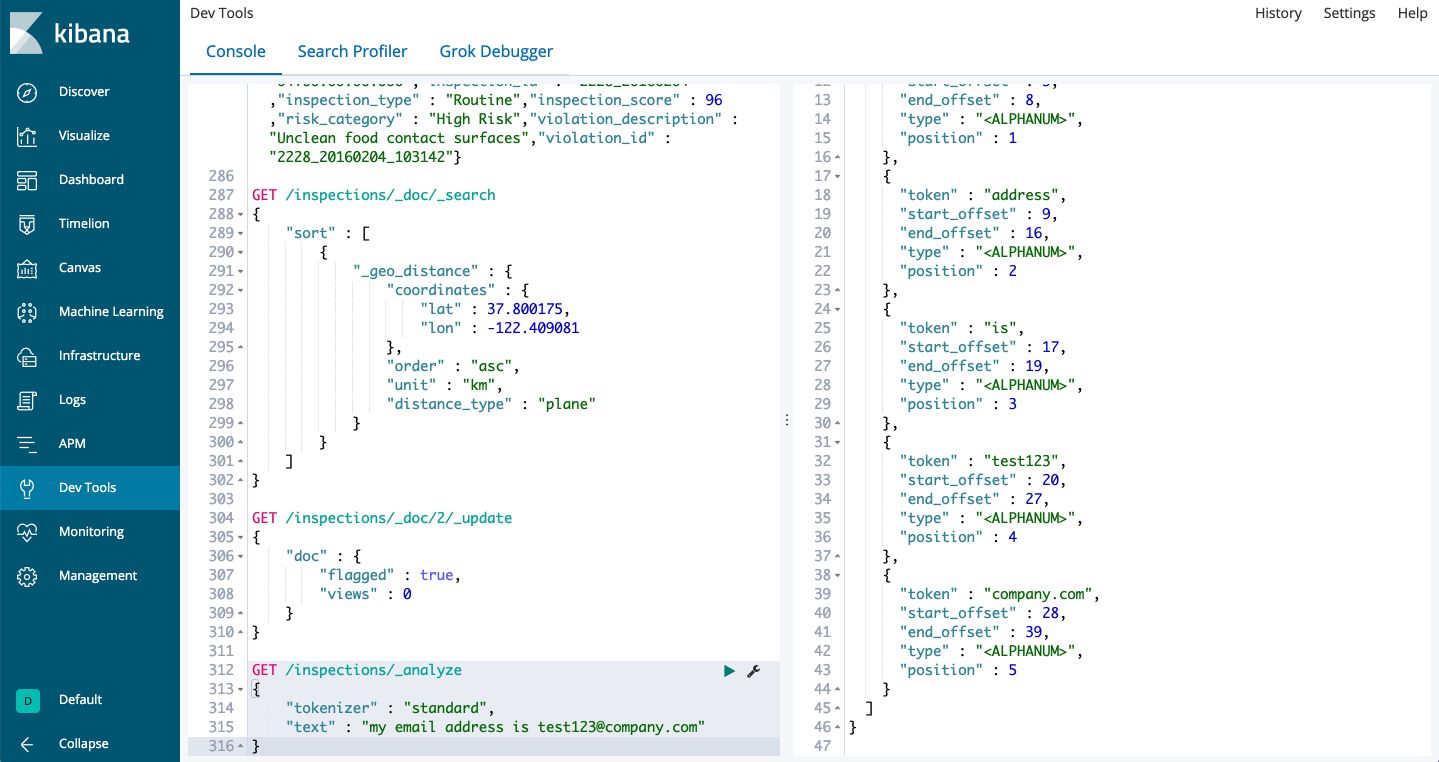
Standard tokenizer will remove the @ within the email address and cut the text at each whitespace. We can force to take only white spaces into account :
GET /inspections/_analyze
{
    "tokenizer" : "whitespace",
    "text" : "my email address is test123@company.com"
}
We can also use filters on top on those tokens :
GET /inspections/_analyze
{
    "tokenizer" : "whitespace",
    "filter" : ["lowercase", "unique"],
    "text" : "Brown brown brown fox Fox fox Wild wild wild"
}
Which puts to lowercase all words and returns only the first unique word using whitespace tokenizer :
{
"tokens" : [
    {
        "token" : "brown",
        "start_offset" : 0,
        "end_offset" : 5,
        "type" : "word",
        "position" : 0
    },
    {
        "token" : "fox",
        "start_offset" : 18,
        "end_offset" : 21,
        "type" : "word",
        "position" : 1
    },
    {
        "token" : "wild",
        "start_offset" : 30,
        "end_offset" : 34,
        "type" : "word",
        "position" : 2
    }
]
}
*Conclusion *: This was a basic introduction to the Dev Tools console in Elasticsearch! Don’t hesitate to drop a comment if you have any question.